Cover Nigella Lawson returns to TV with new cooking show, Cook, Eat, Repeat, on BBC
Nigella Lawson returns to TV with new cooking show, Cook, Eat, Repeat, on BBC
1 / 1
These recipes will be featured in her new cooking show, Cook, Eat Repeat
When the whole world went on lockdown last year due to the coronavirus pandemic, British chef and cookbook author Nigella Lawson made the most out of this difficult period dreaming up delicious new recipes that nourished her mind and body. And as the whole world slowly recovers from Covid-19, she will be sharing these creations in her new cooking show, Cook, Eat, Repeat, premiering on BBC Lifestyle (StarHub channel 432) and BBC Player on August 16.
Lawson shared that the six-episode series is a celebration of the power of food to transform every single day. "I think we all learned over lockdown that thinking about what to eat, cooking it, sitting down to what we’ve cooked, really gave a focus to our lives that we were grateful for," she explained, adding that the dishes she would be cooking "delve into the ingredients I love and recipes I always return to".
Borne during the pandemic, you will find that the recipes are created with home cooks in mind and can be easily replicated in their kitchens—from the crisp and addictive fried chicken sandwich to the creamy crab mac n' cheese. Here are three of her recipes to get you started.
Related: Adobo: Simple Home Recipe Of This Popular Filipino Dish
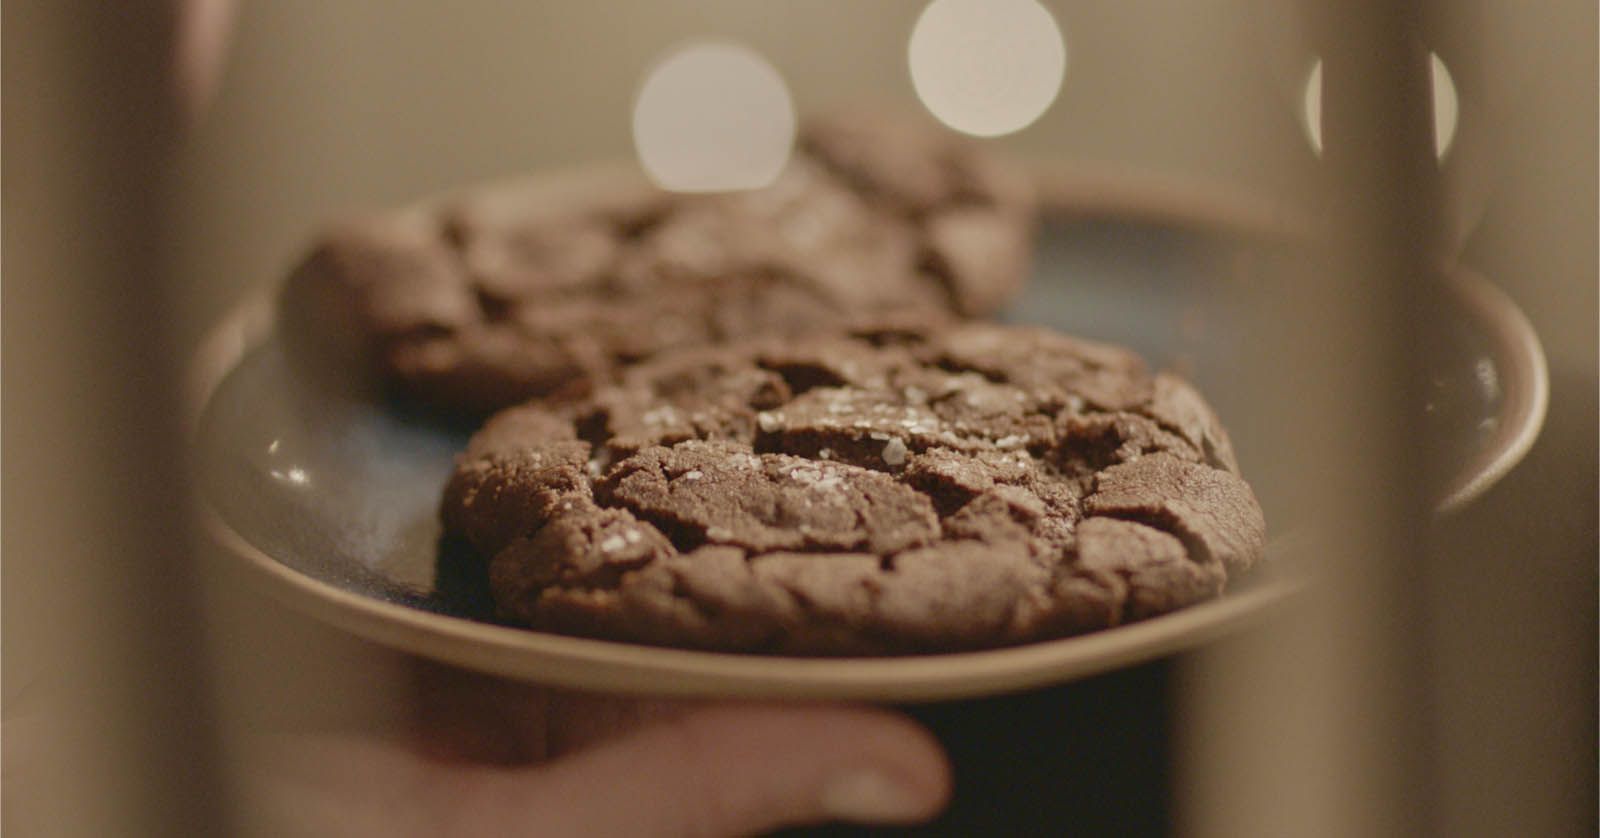
Mine-All-Mine Sweet and Salty Chocolate Cookies

Above Old-Fashioned Sandwich Loaf
Old-Fashioned Sandwich Loaf
1 / 1
Makes 2 large cookies
Ingredients
- 50g plain flour (or gluten-free plain flour)
- 10g cocoa
- 1/8 teaspoon baking powder (glutenfree if necessary)
- 1/8 teaspoon bicarbonate of soda
- 1/8 teaspoon fine sea salt
- 50g soft unsalted butter (or dairy-free baking block if you want these to be vegan)
- 25g caster sugar
- 15g soft dark brown sugar
- ¼ teaspoon vanilla extract
- 25g dark chocolate chips
- ¼ teaspoon sea salt flakes
Method
- Heat the oven to 180ºC/160ºC Fan, and get out a—preferably light-coloured—baking sheet. You don’t need to line it if it’s nonstick; otherwise, place a sheet of baking parchment on it.
- Stir the flour, cocoa, baking powder, bicarbonate of soda and fine sea salt together in a small bowl just to combine them.
- In a slightly larger bowl—I use a pudding basin that I now can’t look at without thinking of these cookies—vigorously beat the butter, both the sugars and the vanilla with a small wooden spoon until you have a coloured and creamy mixture. If you aren’t a messy person, you could use a cereal bowl for this.
- Add a generous spoonful of the dry ingredients to the creamed butter and sugar and beat it in gently with your wooden spoon. Then, still gently, unless you want cocoa and flour all over the place – beat in the rest of your dry ingredients, in about three batches. Once the dry ingredients are absorbed, you can beat vigorously until you have a sticky, rich-brown dough, that clumps together, at which point you can stir in the chocolate chips.
- It’s not often I demand this level of precision, but I now weigh this mixture, and divide it in two; you don’t need to be fanatical about this, a few grams here or there won’t make the difference. Squidge each half in your hands to form two fat patties about 7cm in diameter and place them on your baking sheet, at least 10cm apart, as they spread while cooking.
- Sprinkle 1/8 teaspoon of sea salt flakes over each cookie, and bake in the oven for about 12 minutes, until the top of each biscuit is riven with cracks. At 10 minutes—which is when I start checking they will be utterly smooth, but in the next 2 minutes, they seem to transform themselves. I crouch by the oven, staring through the cloudy glass door feeling like, as the old Joan Rivers joke has it (and forgive me if you’ve heard me tell this before), Elizabeth Taylor shouting ‘Hurry!’ at the microwave.
- Once the surface is cracked, and the cookies have spread, they are ready. They will, however, feel very soft— even uncooked—to the touch, and you will doubt me. But I will forgive you, as long as you obey me. So whip out the baking sheet, leaving the cookies in place for 5.minutes. Only then may you slip a metal spatula under the cookies and tenderly transfer them to a wire rack. For optimal eating pleasure, leave for another 10 minutes before biting into one. I often succumb after 5, which is perfectly permissible, I feel, though I should warn you that the biscuit is unlikely to hold its shape by then. But in times of urgent need, such matters of form scarcely matter.
Chocolate Peanut Butter Cake
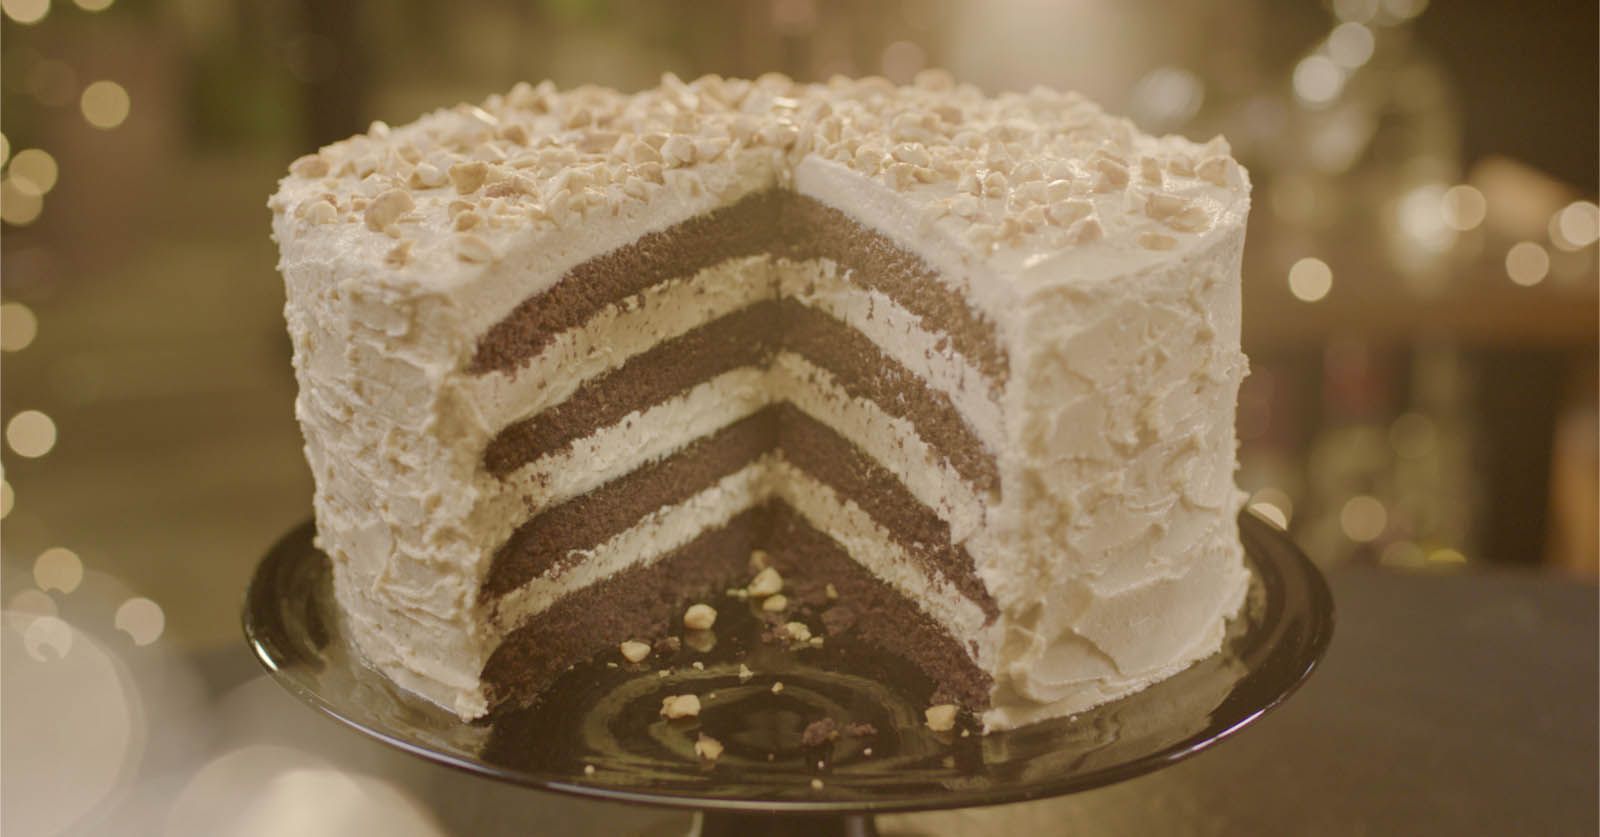
Above Chocolate Peanut Butter Cake
Chocolate Peanut Butter Cake
1 / 1
Makes 10 to 12 slices
Ingredients
For the cake
- 200g unsalted butter, plus more for greasing
- 250ml hot water from a just-boiled kettle
- 50g cocoa
- 100g soft dark brown sugar
- 125g caster sugar
- 2 teaspoons vanilla extract
- 225g plain flour
- 1 teaspoon baking powder
- ½ teaspoon bicarbonate soda
- 2 large eggs, at room temperature
For the icing
(Double the quantities below if making a four-tier cake)
- 300g icing sugar
- 150g soft unsalted butter
- 200g smooth peanut butter (see recipe intro)
- 1 teaspoon vanilla extract
- ¼ teaspoon fine sea salt
- 4 x 15ml tablespoons (60ml) double cream
To decorate
- 4 x 15ml tablespoons (30g) dry roasted peanuts, chopped
Method
- Heat the oven to 180ºC/160ºC Fan. Butter two 20cm sandwich tins (or four tier-cake tins) and line them with baking parchment. Don’t use loose-bottomed tins as this is a runny batter.
- Cut the butter lengthways into four pieces (just to aid melting) and put into a heavy-based fairly wide saucepan – I use one of 22cm diameter – and set over gentle heat. Add the just-boiled water, and whisk in the cocoa and both brown and white sugars, and keep on low heat, whisking gently, until the butter has melted, and you have a smooth, amalgamated mixture. Remove from the heat, and stir in the vanilla extract. Let stand for 5 minutes.
- Measure out the flour in a bowl, add the baking powder and bicarb and fork to mix. Whisk the eggs together in a small jug.
- Pour the eggs gradually into the pan, whisking all the while, until they are completely absorbed.
- Finally, whisk in the flour slowly and gently until you have a smooth batter, and pour and scrape evenly into your waiting tins.
- Bake in the oven for 18–20 minutes (or approx. 7 minutes for the ultra-shallow tins), by which time the cakes will be beginning to shrink away at the edges, and a cake tester will come out leanish; it is a damp cake, though, so it’s fine if a few crumbs cling to the cake tester.
- Leave the cakes to cool for 10–15 minutes on a rack; they can be turned out once the tins are not so hot that you’d need to use oven gloves. Or you can leave them in their tins until cold. I always do this if making the 4-tier variant.
- To make the buttercream, you must first sift the icing sugar into a bowl. This is one of the few jobs in the kitchen I hate, so I wouldn’t tell you to do it if it weren’t necessary.
- In another – large – bowl (or the bowl of a freestanding mixer that you’ve fitted with the whisk), beat the butter and peanut butter together very thoroughly; that’s to say, for 3 minutes if you’re using a mixer, or 5 minutes with a handheld electric whisk, by which time you should have a light and fluffy creamy mixture. Beat in the vanilla extract and salt.
- Still beating, but now at a slightly lower speed, patiently add the sieved icing sugar a spoonful at a time until you’ve used half of it, then beat in the rest in 3 batches. Once it’s all in, turn up the mixer a little and carry on beating for 2 minutes, or for 3 with a handheld electric whisk. Scrape down the sides, to incorporate any icing sugar clinging to the bowl, and beat again for 30 seconds–1 minute.
- Still beating, add the cream a tablespoonful at a time and, when it’s all in, carry on beating for 4 minutes (or for 6 minutes with a handheld electric whisk) until you have a soft, aerated and moussily light mixture.
- Peel away the lining papers from the cakes and place one of the layers, flat-side up, on a cake stand or plate. If this is a 2-layer cake, spread – armed, ideally, with a bendy spatula and a small offset spatula – about a third of the icing evenly onto the waiting cake layer, taking it right out to the very edges of the circle; this will bulge out a bit when you place the other cake on top, which will make it easier for you to ice the sides. And if this is a 4-layer cake, just think in terms of spreading the icing 1cm thick.
- Top with your second cake, placing it domed-side up, so that the two flat sides are meeting. Then spread another third of the icing over the top. And if making a 4-layer cake, create your tower, spreading 1cm thickness of icing between each layer, and on the top.
- Use the bendy spatula to get a dollop of buttercream onto the side of the cake, then spread it gently to cover and smooth, ideally with a small offset spatula, and carry on like this, with your two tools, until the cake is covered all the way round. Then run the offset spatula on top and all round the cake again to smooth the buttercream. Leave plain or decorate with the chopped peanuts or as your heart desires.
Basque Burnt Cheesecake
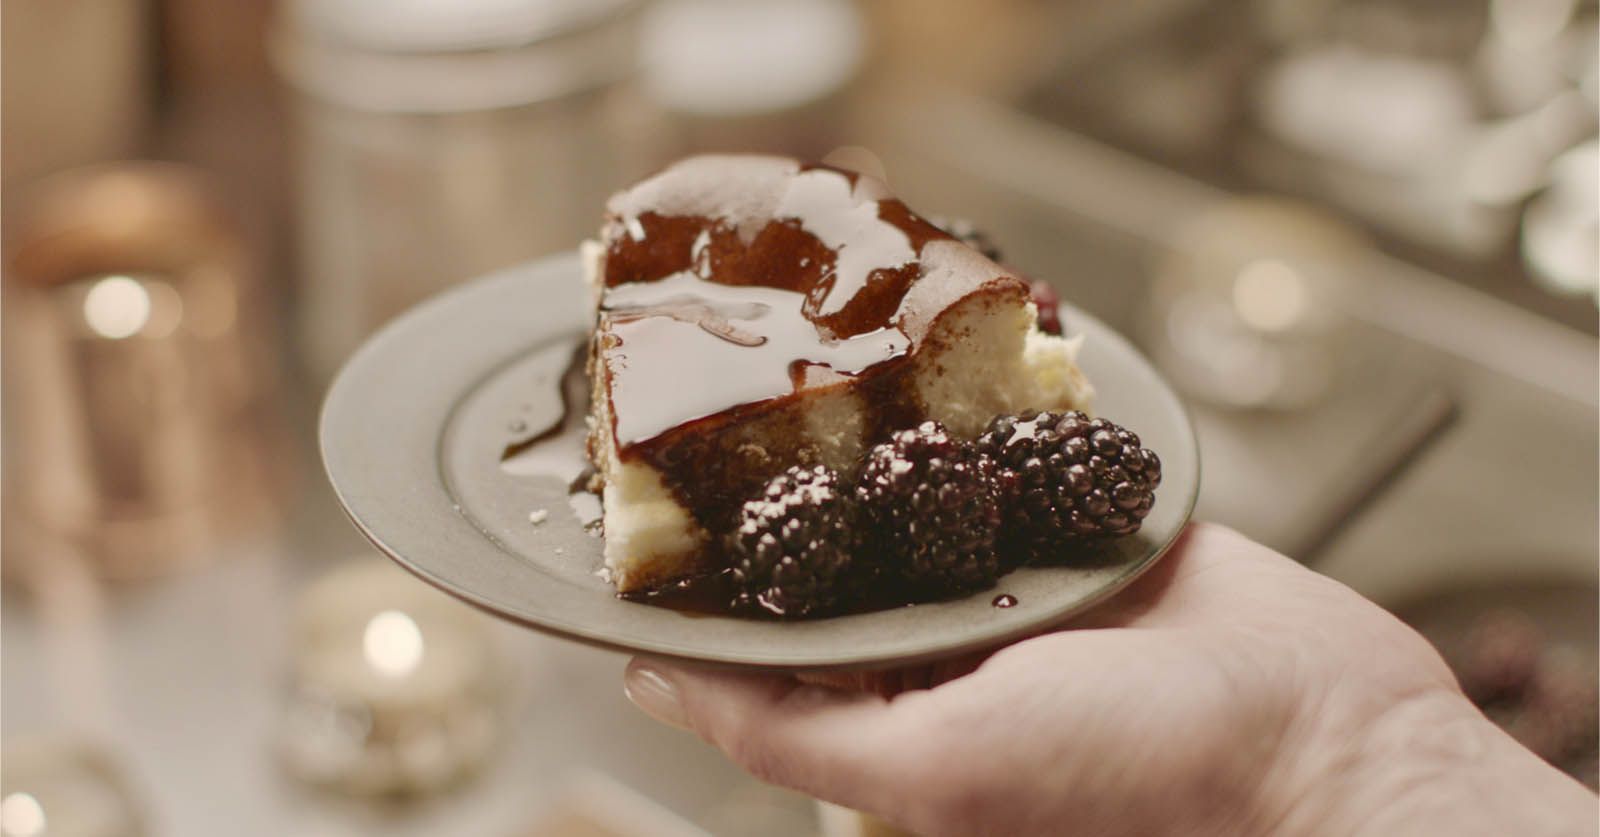
Above Basque Burnt Cheesecake
Basque Burnt Cheesecake
1 / 1
Makes 8 to 12 slices
Ingredients
For the cheesecake
- 600g full-fat cream cheese, at room temperature
- 175g caster sugar
- 3 large eggs, at room temperature
- 300ml sour cream, at room temperature
- ¼ teaspoon fine sea salt
- 25g cornflour
For the sauce
- 15g hard pure liquorice pellets
- 90g caster sugar
- 300ml water
- A pinch of fine sea salt (optional)
To serve
- Blackberries or other berries of your choice
Method
- Heat the oven to 200ºC/180ºC Fan. Get out a 20cm spring form tin and a roll of baking parchment. Unfurl a long piece from the roll, and when it looks like you’ve got enough to line the tin with an overhang of 5–7cm, tear it off and press it into the tin, and down into the edges at the bottom. Now do the same again with a second piece, placing it perpendicular to the first so that the tin is entirely lined. Push this piece down, too, and don’t worry about any pleats, creases and wrinkles; this is The Look. Sit something heavy in the tin to keep the paper in place while you get on with the cheesecake mixture.
- I use a freestanding mixer fitted with the flat paddle for this, but you could easily use a large mixing bowl, wooden spoon and elbow grease. First beat the cream cheese with the sugar until light and smooth; I beat for quite a long time, certainly not under 2 minutes, and it would be at least 5 minutes by hand. It is absolutely essential – and I’m sorry to repeat myself – that the cream cheese is at room temperature before you start.
- Beat in the eggs, one at a time, waiting for each one to be incorporated before adding the next, and when they’re all mixed in, you can—beating all the while—pour in the sour cream.
- Once that is also incorporated, you can slow down the mixer a little (or risk getting cornflour all over yourself) and then beat in the salt, followed by the cornflour, one teaspoon at a time. Remove the bowl from the mixer, scrape down the sides with a silicon spatula, and give everything a good stir.
- Pour into the lined tin (removing whatever’s been sitting in it, obviously), making sure no cheesecake mix is left in the bowl, and then rap the filled tin on the work surface about five times to get rid of any air bubbles.
- Place in the oven and bake for 50 minutes, by which time the cheesecake will be a burnished bronze on top, even chestnut brown in places, and it’ll have risen, like a dense soufflé. It will, however, still be very jiggly. It’s meant to be. You’ll think it’s undercooked, but it will carry on cooking as it cools, and it should have a soft set, anyway.
- Remove the tin to a wire rack and leave to cool. It will sink in the middle a little, but that too is part of its traditional appearance. I reckon it’s cool enough to eat after 3 hours, although you may need to leave it for a little longer. If you want to chill it in the fridge, do, but not for more than 30 minutes.
- Make the liquorice sauce once the cheesecake is out of the oven. If you have a bullet blender, you can pulverise the liquorice pastilles first, but whether whole or powder, put in a small saucepan with 300ml of water. Stir in the sugar, then put on a lowish flame until the liquorice has all but dissolved, stirring to give it a bit of a nudge every now and again to help it melt. Then turn up the heat and let bubble away until reduced to 150ml – turning the heat down a bit if it looks like it’s boiling over. In a 14cm diameter pan, I find this can take up to 20 minutes. Keep checking – you’ll need a small heatproof measuring jug by your side. take Stir in a pinch of salt if finished leave to cool, when it will have the texture of a syrup, which in effect, it is.
- Before serving, unclip and lift the sides of the tin up and away, and then lift the cheesecake up with the edges of the parchment. Place this on a board, and peel the paper back, and take it like that, rustically beautiful, to the table, along with your blackberries and even blacker liquorice syrup. Just drizzle a little over the slices of cheesecake as you hand them out, allowing hardcore liquorice lovers to spoon more over as they eat.
These recipes were re-published with permission from BBC.
Topics

Dudi Aureus is the senior dining and travel editor at Tatler Singapore, covering the city’s most exciting restaurants, global travel trends, and the personalities shaping the culinary and lifestyle scenes. She also serves as co-jury chair for the Tatler Best awards in Singapore, celebrating the very best in hospitality. When she’s off duty, she can often be found at a favourite hole-in-the-wall Thai spot, savouring a perfectly balanced pad thai.